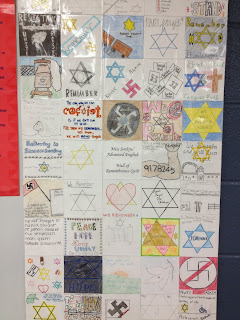
- Choose something that stuck with you during your study of the Holocaust.
- It can be a design which commemorates an event or person.
- It can be a hopeful design, looking toward the future.
- It does not have to be sad. However, it should be reverent. It should in no way mock or make light of the Holocaust.
- Please put some thought into it and make it personal to you.
- You may draw or use a collage technique. However, it should not simply be a printout of a picture from the internet or clip art.
- You will not be graded on how well you draw. Instead, you will be graded on the thoughtfulness and insight you put into the square.
- This will be a culmination of the unit, so it should reflect your learning in the 3 weeks of study.
- It may be in color or black and white, whatever you feel appropriate.
- It may contain words as well as pictures, or be just a picture.
To assemble, I try to space them out so there is a good mix of color and black and white. I tape them on the back with Scotch tape to form the horizontal sections. Then I tape the horizontal sections together to form the quilt. I have found that it’s best to back it with construction paper. It holds up much better! Finally, I have it laminated and hang it in my room.
The kids find this very satisfying – to put what they learn and feel into a picture. The pictures run the gambit from amazingly detailed to simple. As with anything, there are kids who don’t do a stellar job, but when put together, they all look nice. I have all of the previous year’s hanging in my room, so the kids see the project all year and look forward to it. They also feel a sense of pride and legacy knowing I will keep theirs up for years to come as well.


No comments:
Post a Comment